Managing Customers
Overview
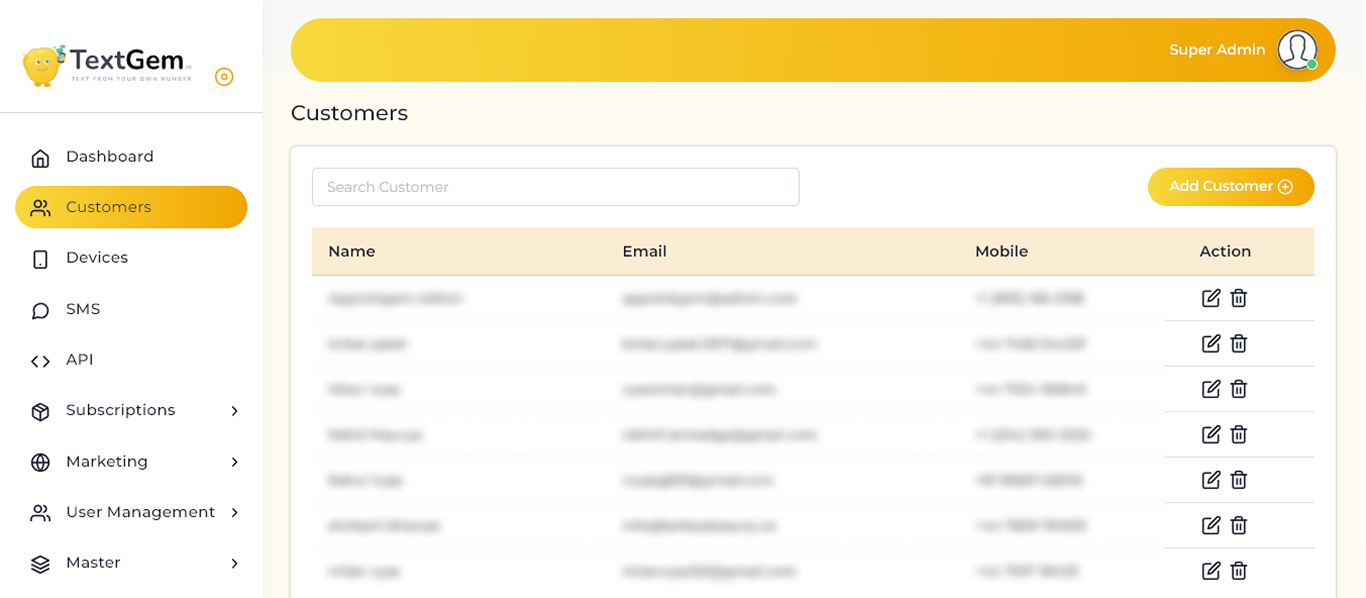
The Customers page displays a complete list of all registered customers along with their contact details. Administrators can search for specific customers, create new customer accounts, edit existing information, or remove accounts when required.
This centralized view makes customer management simple and efficient.
Customer List
The customer table provides a detailed overview of all registered users.
Available Information
Each customer record includes:
The table is designed to help administrators quickly locate and manage customer accounts.
Search Customers
Use the search field located at the top of the page to find specific customers.
How to Search
Benefits
Adding a New Customer
The Add Customer button allows administrators to create a new customer account.
To Add a Customer
Typical Information Required
Editing Customer Information
Customer records can be updated whenever information changes.
To Edit a Customer
Common Updates
Important Note
Deleting a customer may permanently remove associated account information. Ensure the account is no longer required before proceeding.
Pagination and Record Display
The customer list supports pagination for easier navigation.
Features
This helps maintain performance and improves usability when managing large customer databases.
Best Practices
Edit Customer
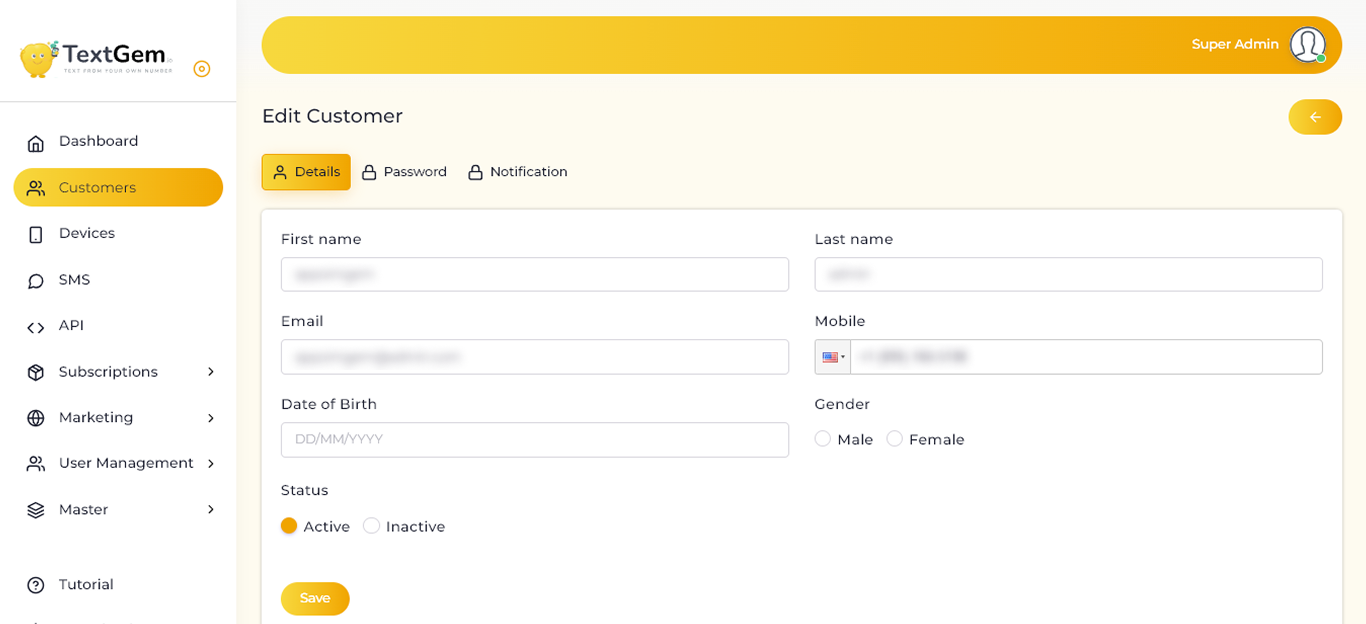
The Edit Customer page allows administrators to update customer account information, manage login credentials, and configure notification preferences. This page helps ensure that customer records remain accurate and up to date.
Edit Customer Overview
The Edit Customer page is divided into three sections:
Each section can be accessed through the tabs at the top of the page.
Customer Details
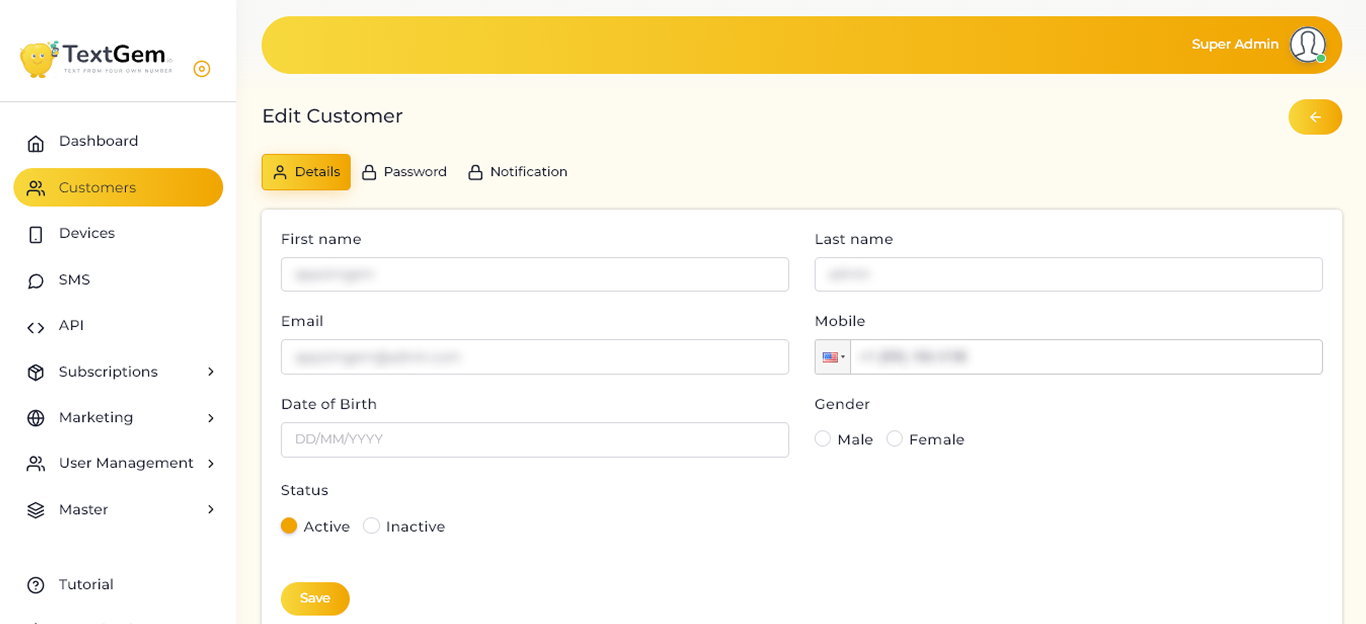
The Details tab contains the customer’s basic account information.
Available Fields
You can update the following information:
All changes remain editable until they are saved.
Updating Customer Information
Follow these steps to update a customer's profile:
The updated information becomes available immediately after saving.
Managing Account Status
Administrators can control whether a customer account is active.
Available Status Options
Changing the account status does not remove customer data.
Password Management
The Password tab allows administrators to update the customer’s login password.
To Change a Password
Use a strong password containing a combination of letters, numbers, and special characters to improve account security.
Notification Settings
The Notification tab allows administrators to manage customer notification preferences.
Depending on system configuration, notifications may include:
Administrators can enable or disable these notifications as required.
Saving Changes
After updating any customer information:
Best Practices
Customer Details Overview
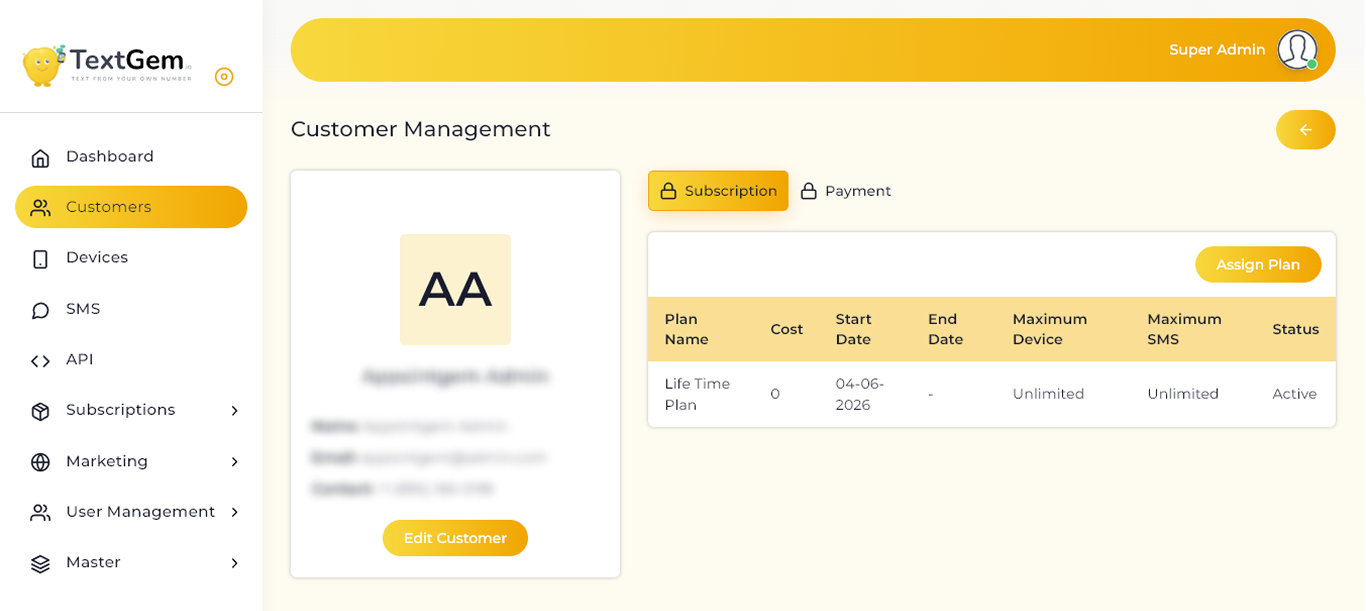
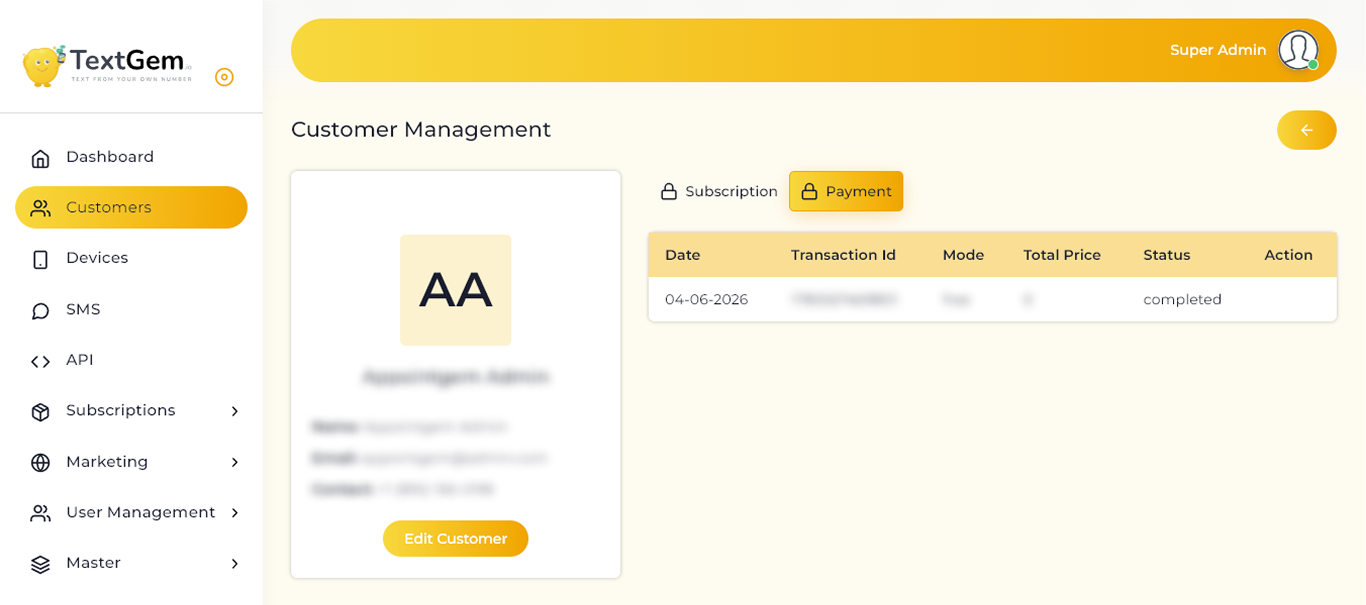
After selecting a customer from the customer list, the Customer Details page displays the customer’s profile on the left and subscription-related information on the right. Tabs allow you to switch between Subscription and Payment details without leaving the page.
Customer Profile
The profile section displays the customer’s basic account information.
Available Information
The following details are available:
This information helps administrators quickly verify the customer’s identity before making any account changes.
Edit Customer
The Edit Customer button allows administrators to update customer information.
To Edit Customer Details
Common Updates
Subscription Management
The Subscription tab displays the customer’s active and previous subscription plans.
Subscription Details
This information helps administrators monitor the customer’s subscription usage and plan limitations.
Assign a Subscription Plan
The Assign Plan button allows administrators to assign a new subscription plan to the customer.
To Assign a Plan
Once assigned, the customer’s subscription information is updated immediately.
Subscription Status
The Status column displays the current state of the customer’s subscription.
Common Status Values
Monitoring subscription status helps ensure uninterrupted access to platform features.
Plan Limits
Each subscription includes usage limits that define the customer’s available resources.
Available Limits
Unlimited plans display Unlimited for applicable limits.
Payment Information
The Payment tab provides access to the customer’s payment history and billing information.
Administrators can review payment records to verify completed transactions, monitor subscription renewals, and track billing activity.
Best Practices
Adding a New Customer
The Add Customer page allows administrators to create a new customer account in TextGem. The setup process is divided into three simple steps: entering customer information, creating login credentials, and configuring notification preferences.
Adding a New Customer Overview
The customer registration wizard guides administrators through the complete account creation process. Each step must be completed before the customer account can be successfully created.
Step 1 – Customer Details
The Customer Details section is used to enter the customer’s basic account information.
Required Information
Complete the following fields:
Providing accurate information ensures the customer account is created correctly.
Enter Customer Information
First Name
Enter the customer’s first name exactly as it should appear on the account.
Last Name
Enter the customer’s last name.
Email Address
Provide a valid email address that will be associated with the customer account.
Mobile Number
Enter the customer’s mobile number, including the appropriate country code.
This number may be used for account communication and SMS services.
Date of Birth
Select or enter the customer’s date of birth using the required date format.
Example
- DD/MM/YYYY
Ensure the entered date is valid before proceeding.
Select Gender
Choose the customer’s gender.
Available Options
- Male
- Female
Set Customer Status
Choose whether the customer account should be active immediately after creation.
Available Options
- Active – The customer can immediately access the platform.
- Inactive – The account is created but remains disabled until activated.
Step 2 – Password
The second step allows administrators to create login credentials for the customer.
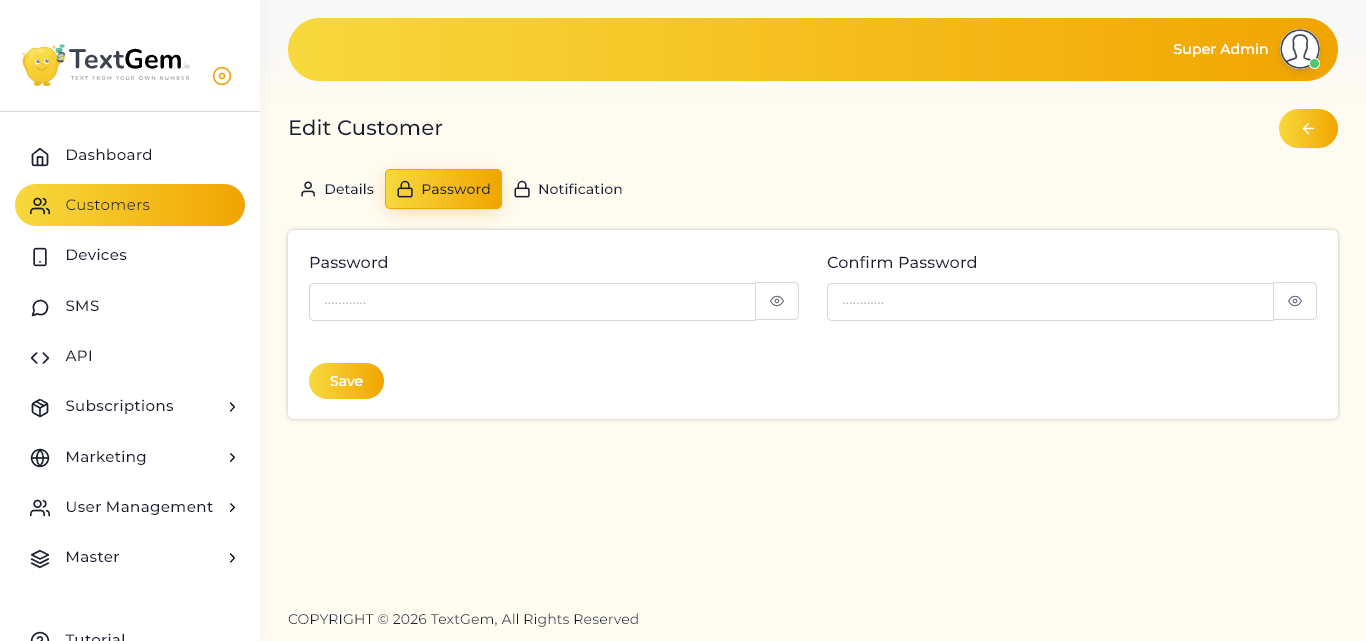
During This Step
The customer will use these credentials to sign in to their account.
Step 3 – Notification Status
The final step allows administrators to configure notification preferences for the customer.
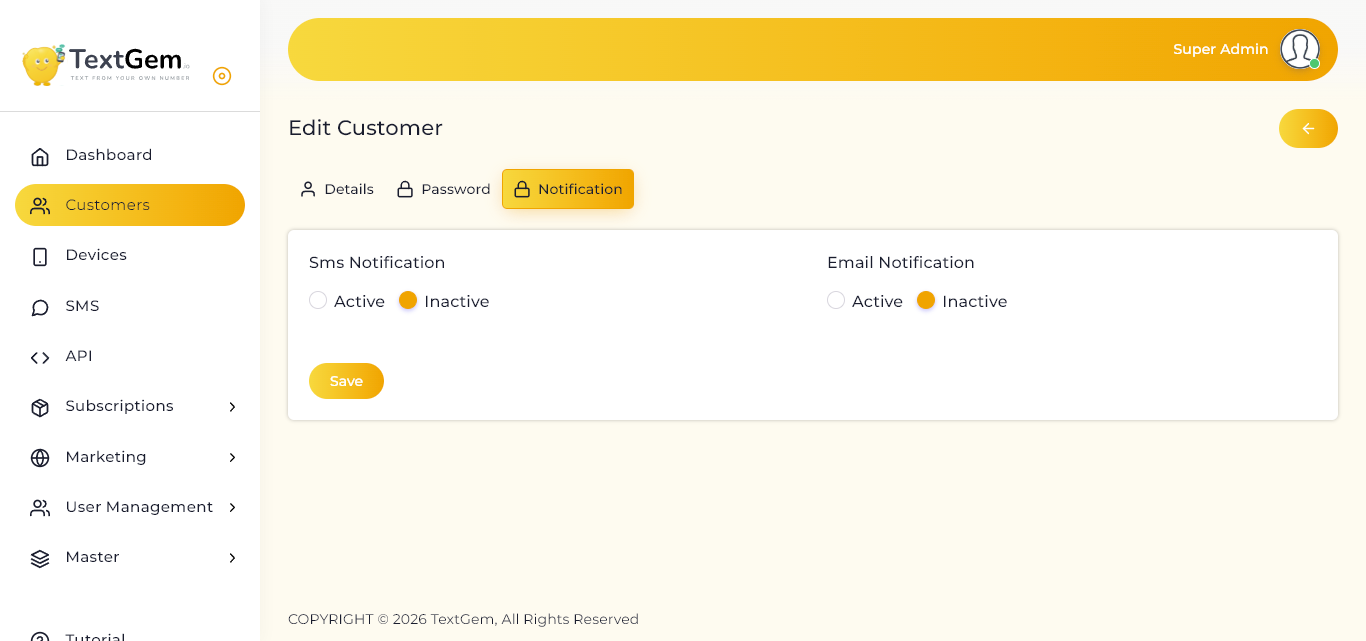
Notification Settings May Include
Once completed, the customer account setup is ready to be finalized.